
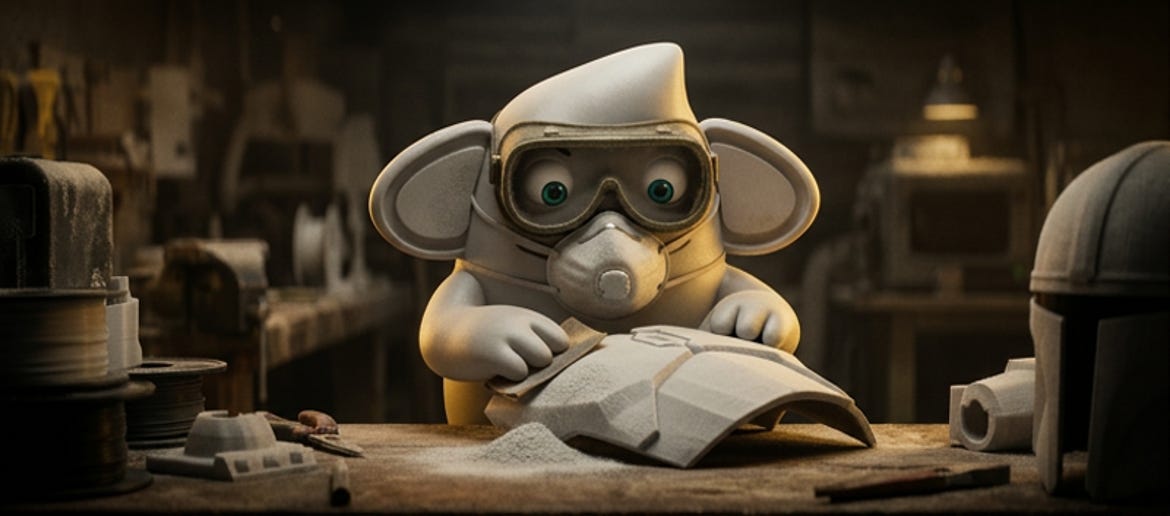
Making Your Own Cosplay Armour: A Beginner’s Guide
August 2026
More and more cosplayers are now turning to 3D printers to create armour, helmets and props instead of relying on traditional techniques such as cutting foam or working with Worbla. The reason is obvious: complex shapes, symmetry and repeatability are much easier to achieve with a printer than by hand, and even elaborate armour pieces can be printed overnight rather than shaped over several weeks. However, anyone new to 3D printing for cosplay needs to modify their approach. The real challenge is no longer getting the shape right, but choosing the right material, post-processing it properly and achieving the desired final finish. This guide summarises how experienced cosplayers typically approach their print projects.
The right filament for cosplay projects
When it comes to choosing materials for armour, helmets and props, certain clear preferences have emerged within the community. PLA is considered the most popular starting point: it is easy to print, holds fine details well and is available in many colours. For parts exposed to greater stress or outdoor conditions, PETG is often used, as it is more resistant to heat and deformation. ABS offers additional stability, but is considered a little more demanding for beginners due to its tendency to warp and the fumes produced during printing. For flexible parts, such as joints or close-fitting elements, TPU is also sometimes used.
- PLA: easy to print, good detail reproduction, ideal for most beginner projects;
- PETG: more robust and heat-resistant, well suited to outdoor use at conventions;
- ABS: high stability, but more prone to warping, recommended for more advanced users;
- TPU or nylon: flexible, for moving or close-fitting parts.
Print settings that make post-processing easier
One detail many beginners underestimate: the amount of work required later can already be reduced at the print settings stage. A lower layer height results in less visible ridges and therefore less sanding afterwards. The orientation of the model during printing also matters, as layer lines can be moved to less visible areas. When it comes to infill, a lower percentage, often around 10–20%, saves weight and material but comes at the expense of stability. It is worth weighing this up depending on the part and the load it will need to withstand later.
Post-processing: from the raw print to a smooth surface
The step that really makes a result look polished and finished is post-processing. The typical process usually looks like this:
- rough sanding with coarser sandpaper, often around 120–220 grit, to remove visible layer lines and larger uneven areas,
- filling gaps, seams or deeper imperfections, usually with classic body filler or a specialist model making filler,
- applying filler primer to even out fine scratches and remaining layer lines and create a uniform surface,
- finer sanding with a higher grit, for example 400–600, sometimes wet sanding,
- repeating the filling, priming and sanding process until the surface is evenly smooth.
Final primer as the base for the actual paint
After the final sanding stage, an even final coat of primer is applied. This is no longer about levelling out imperfections, but about creating a uniform, absorbent surface on which the actual paint can adhere evenly, without different substrates, such as filler next to bare filament, showing through.
A useful tip from the community: do a light-check for quality control. Hold a torch or phone light to the side of the primed surface, as flat as possible, so at a very shallow angle rather than from above. This raking light effect reveals even the smallest imperfections that would be completely invisible in normal room lighting. The reason it works is simple: with direct, frontal light, such as normal ceiling lighting, the light falls relatively evenly across the whole surface, so small height differences hardly cast any shadows. At a shallow angle, however, even a tiny raised area casts a clearly visible shadow behind it, much like long shadows in low evening sun.
Painting and sealing
Once the primer is complete, the paint is applied. Depending on preference and equipment, this can be done with a brush or airbrush. The latter is particularly useful for smooth colour gradients and larger areas. For a realistic, worn look, many cosplayers also use weathering techniques such as washes or drybrushing to visually emphasise edges and recesses. Finally, a clear protective varnish provides durability and an even sheen, whether matt, satin or glossy. This is especially important for 3D printed parts that are worn and handled for several hours at conventions, as the sealant also protects the paint layer underneath from wear caused by contact with clothing or other costume pieces.
Do not forget safety
When post-processing 3D printed cosplay parts, sanding creates fine plastic dust that can irritate the airways if inhaled. Chemical filler primers and fillers can also release fumes while drying, which can quickly become unpleasant in enclosed spaces.
A respirator mask and safety glasses should therefore be part of the basic equipment, regardless of experience level. Good ventilation in the work area is just as important. An open window, or even better, a well-ventilated room, already makes a big difference. Anyone who regularly works on larger cosplay projects may also benefit from a small extraction system or an outdoor workspace.
Conclusion: the path to your first finished cosplay piece
For most experienced cosplayers, the process from raw 3D print to finished cosplay prop follows the same basic pattern: choose a suitable filament, print with carefully considered settings, then sand, fill and prime in several rounds until the surface is flawlessly smooth, before finally painting and sealing it. What may look like many individual steps at first is actually a clearly structured process. Each step builds on the one before it, and none of them requires specialist knowledge that cannot be learned fairly quickly.
The biggest stumbling block for beginners is usually not a lack of experience, but the expectation of achieving a perfect result on the very first attempt. It is more realistic to see the whole process as a learning curve. The first round of sanding, filling and priming probably will not be perfect, but this is exactly where the light-check trick helps you spot weak points early, rather than discovering them only after painting. It is also worth avoiding the most demanding filament at the beginning. Start with PLA to get a feel for the whole process before moving on to more robust, but more difficult, materials such as PETG or ABS.
For anyone printing and post-processing a complete cosplay part for the first time, choosing a small project is highly recommended. One manageable prop instead of a full suit of armour. This allows you to go through the entire process from filament choice to sealing at a comfortable pace, including all the small mistakes and corrections that are bound to happen along the way. The first-hand experience and knowledge you gain of post-processing, timing and common sources of error can then be transferred much more easily to larger, more complex projects such as a full set of armour or an elaborate helmet, with far less frustration and a result that will genuinely look the part at your next convention.
P.S.: Want to see a concrete example of just how far this can go? For Halloween, we recreated the Black Knight from Monty Python, including a 3D printed helmet, sword and a hidden, hand-operated blood-spraying mechanism you can print yourself. Watch the video if you want to see how the post-processing tips from this article come together in a real project.
FAQs – Frequently asked questions about cosplay with 3D printing
Which filament is best for cosplay beginners?
PLA is generally considered the easiest starting point for cosplay, as it is easy to print and offers good detail reproduction.
How do I remove layer lines from a 3D print?
Layer lines are not just an issue when printing cosplay props! Repeated sanding passes with increasingly finer grit, combined with filler primer, can help smooth out fine imperfections.
Is an airbrush essential for cosplay props?
No, having an airbrush is not essential for creating cosplay props. Good results can also be achieved with a brush. An airbrush mainly makes smooth gradients and large surfaces easier.
How can I protect myself when sanding and priming cosplay props?
A respirator mask, safety glasses and sufficient ventilation help protect you while working on your cosplay props, as sanding can produce fine dust and chemical primers can release fumes.
How long does post-processing a printed cosplay part take?
That depends heavily on their size and the quality you want to achieve. A smaller prop can often be completed in one or two evenings, while larger armour pieces with several rounds of sanding, filling and priming can take several days. It is a great hobby, after all.
Can PLA filament survive outdoor conventions?
PLA can deform in strong sunlight or in a hot car. For outdoor use or hot convention days, PETG is the more robust choice.
Do I need to allow extra wall thickness when designing armour?
Yes. Since sanding and post-processing remove material, the wall thickness should be planned a little more generously from the start to allow for material loss during the finishing process.
Which are the mistakes to avoid as a cosplay beginner?
Common beginner mistakes include too few sanding passes before priming, paint layers that are too thick and skipping the light check before the final paintwork. All of these often lead to visible unevenness in the finished result.
Can I join several printed parts together?
Yes, larger armour pieces are often printed as several individual parts and then glued or screwed together. Additional filling at the seams helps make the transition invisible.
What is the best way to store my finished cosplay piece between conventions?
Ideally, store it somewhere dry, protected from direct sunlight and not under constant heavy mechanical stress, to avoid deformation or damage to the paint layer.
Related products
-
Nobufil PLAx Matt Artist Grey, 1.75 mm / 1000 g
- Made from recycled plastics
- Improved formula
- Increased impact resistance
-
Revell Airbrush Basic Set with Compressor
- Ideal for getting started
- Quality metal spray gun
- Single-action system
Magazine Articles:
Discover 3DJake:
-
Delivery in 3 business days.
More than 11.250 products
We deliver worldwide to
more than 40 countriesSecure payments
with SSL encryption technology
